Written by: Tim Connolly | Image collected by : ZWO
Tim Connolly, a close friend of ZWO from the United States who loves astronomy.
Imaging comets has never been as easy thanks to the ZWO ASIAIR. With the accuracy of SkySafari’s database of Comets, combined with the ASIAIR’s plate solving, locating comets has never been so simple and fun to do.
On the night of December 7, 2018, under the sky of a clear moonless night, I setup my Celestron 9.25” EdgeHD SCT with a Hyperstar F2.2 lens on the CGEM DX mount.
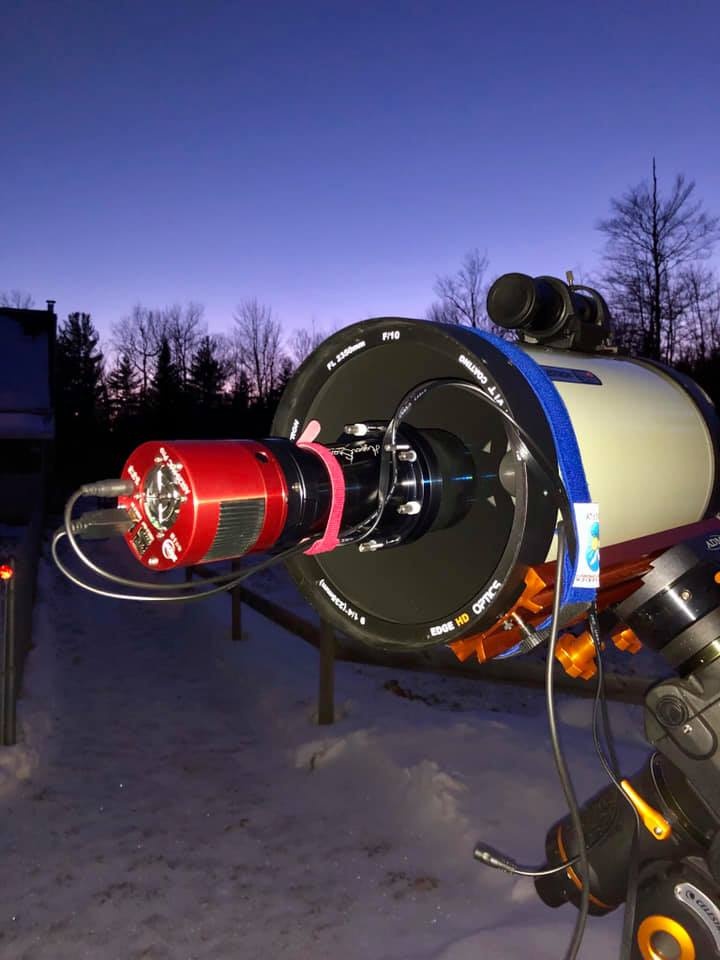
I used a ZWO ASI294 MC-Pro camera for one shot color captures. For guiding I used a 50 mm guide scope with a ZWO ASI224 MC guide camera. I connected the wires to the cameras, mount and the ASIAIR.
I powered on the mount. At the end of every session, I put the mount to home position and hibernate. So, when I powered on the mount and woke up the mount, the alignment was ready to go.

I opened the ASIAIR Application on my iPhone X and connected to the cameras and the mount. I used Polaris for focusing and went in the focus screen in the ASIAIR.
I set the exposure 0.5 seconds with the auto-stretch feature enabled in the histogram. I zoomed in on Polaris on the focus screen by dragging the green box over the star. When zoomed in, a star profile is displayed along with a graph plotting the Half Flux Diameter (HFD) values.
I adjust to get this value as low as I can but with caution not to chase the seeing. Once I was satisfied with the focus, I was all set outdoors and could go inside. ZWO is developing an auto-focuser which will be compatible with the ASIAIR. Until this is released, I have to remain outside until I achieve focus.
I went inside, powered on my WiFi extender to extend the 5GHZ signal. From the warmth and comfort of my house, I opened my Starseek application which is the same application as SkySafari. I connected my mount and ensured my Solar System database was updated so the coordinates of the comet would be accurate.

I slewed the scope to Comet 46P and took a 5 second preview of image. The comet was close to centered on the screen. On the preview screen, there are control buttons which I used to center the comet.
I then tested the exposure with various exposure lengths, high, medium and low gain. I found medium gain with a 30 second exposure was perfect for my F2.2 setup. Once I was happy with the framing and exposure, I went in to the guiding screen.
I calibrated the guider on a star on the guider screen. While the guider was going through the steps, I went in to the Shooting Screen under Autorun in the ASIAIR application. On this screen, I named my object, chose my exposure length, number of exposures, Binning, and ensured the image was classified as a Light frame for image naming purposes.
The number of exposures I used for imaging the comet was 30. When I went back to the guide screen in the ASIAIR application, the guiding was locked on the star and communicating with the mount. I reset the guide graph and ensured my RMS values were appropriate.
I like my RMS values to be under 2.0. Once the guide graph was stabilized, I went to the Autorun screen on the ASIAIR application and began the capture. The images are saved directly to the MicroSD card in the ASIAIR with 25 GB of available storage.

I keep three additional MicroSD cards on hand which have the ASIAIR Operating System on them in case there is an issue with the MicroSD card or I need more storage. Once the imaging was complete, I captured my calibration frames (dark frames, bias frames and flat frames). I retrieved the MicroSD card from the ASIAIR and transferred the files, using the supplied adapter, to my laptop.
I then calibrated, stacked and processed the images in PixInSight. I previously used the free version of Deep Sky Stacker and Photoshop to complete this process.

Good Luck imaging the comet and clear skies.
Comet 46P | Part of image shows


Hi
Fantastic job, I am struggling with asiair, as my images look awful, they come out black and white and only 640 res from my asi224. Any help would be great. Keep up the good work
0
0
Hi
You could send your questions and images to decribe this question to support@zwoptical.com
You could also join our facebook group: ZWO ASIAIR
https://www.facebook.com/groups/ASIAIR/
0
0