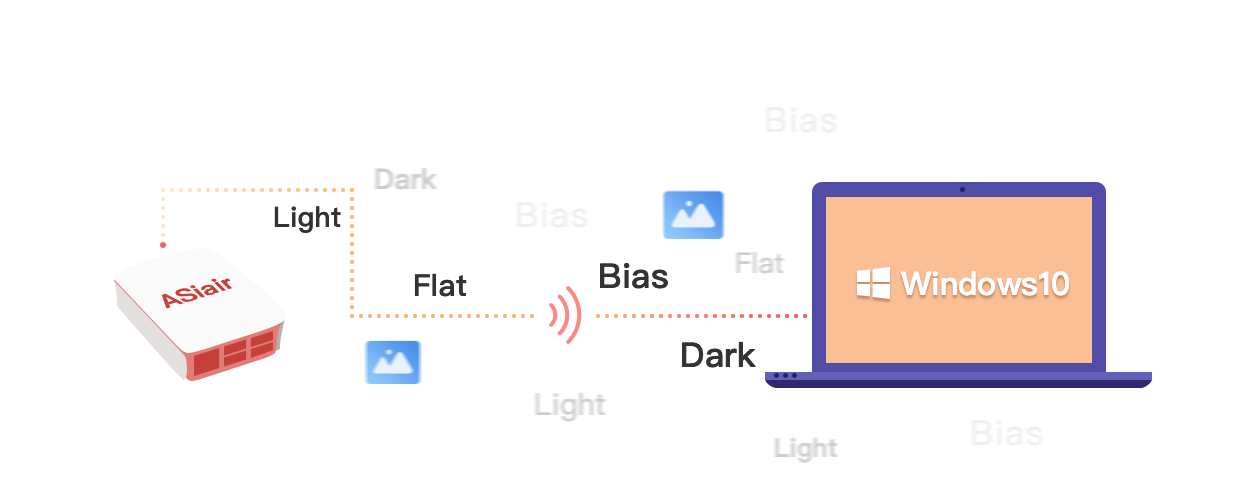
The next step after a long night imaging is transferring the data to your PC for processing in your favorite software. With ASIAIR there are three main methods to copy your data from the device to your PC.
Transferring Images from ASIAIR to your computer
1. Using an SD Card Reader
The SD card reader is easy to use and also included in the box with your ASIAIR, or you can use your own SD card reader if you prefer.
Insert the SD card with the red lettering face up and then plug the card reader into your computer’s USB port.

A Windows 10 PC will prompt you to format the card – STOP!
You MUST select CANCEL at this point else you will format the ASIAIR boot system.
You will lose all data on the card including the ASIAIR operating system if you format the SD card!

Choose Cancel
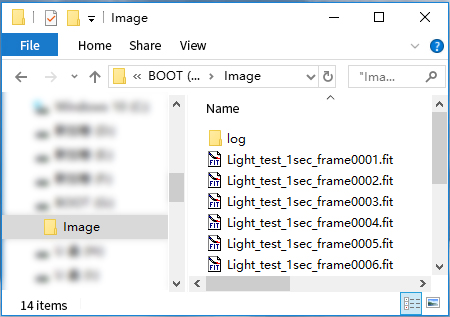
Press Cancel – then double click This Computer to open the File Manager. Click the drive marked BOOT and then select the Images directory. You can then copy the image files from this directory onto your PC. You can delete these images if you are short on drive space on the ASIAIR or leave them in place if you wish.
2. Access via ASIAIR Wi-Fi Connection (Recommended Method)
The use of an SD Card Reader is simple, but removing the SD card from the ASIAIR is inconvenient. An alternative method is to access the ASIAIR image data via the ASIAIR Wi-Fi connection.
After connecting to the ASIAIR Wi-Fi network, open the computers File Manager and enter the following in the address bar:
\\asiair
Or alternatively using the following IP address:
\\10.0.0.1
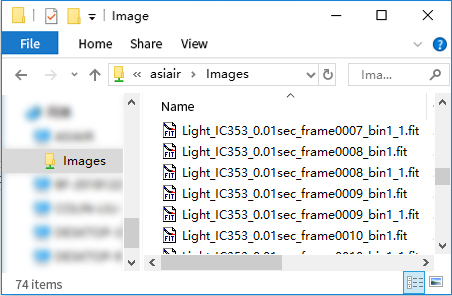
You will find an ASIAIR shared directory which is set to read-only for security. You can copy the files from this location to your computer.
3. Using a wired LAN connection
This method is similar to using the Wi-Fi connection but this time utilizes the wired LAN connection. Connect the ASIAIR to your network using the LAN cable port and access the ASIAIR by name. Using the IP address is not possible when using the wired LAN port.
A BRIEF SUMMARY
There are three main methods of downloading image data from the ASIAIR. These vary in ease and convenience depending on your own set up.
We highly recommend using the ASIAIR Wi-Fi connection method due to its ease of use.

Constantly get connection refused with both wired and wireless connection. When trying to access via file, it says file not found
0
0
Hello! We apologize for this inconvenience. Please contact our support(support@zwoptical.com). They have the expertise and resources to assist you effectively.
0
0
I put the mini sd card in and got the boot opened it and found no images I have also put the usb stick in and nothing in there either
What am I doing wrong? only thing I can see is as I took preview photo’s they didn’t go into the usb stick nor the boot image folder, do you have to manually download them onto the sd stick or image folder?
Lynn a
1
0
Preview photo have to manually download.
0
0
I have the same problem. Images are not being saved on both, neither camera and nor ASIAir card. I have lost two clear nights taking photographs and not being able to process them because they are just not being saved. I use ASIAir in combination with Nikon D5300
1
0
Please pay attention to the Image Format: RAW (RAW + JPEG not available)
1
0
Hi, my AsiAir Pro is connected to my Home Network using “WIFI Station Mode”. Is there any way to access the USB pictures using my PC? I tried \\10.0.0.1 or \\asiair but are not working. Thank you.
0
0
Please find your IP in ASIAIR App.
0
0
3rd method – what do you mean by ‘access by name’? Device is not showing in my llocal neighbourhood, so WHERE and HOW should I put its name? Thanks 🙂
33
22
Sorry about this, this article need to be update.
Please find ASIAIR IP address first, then visit it with file explorer.
Here is how to find IP address in ASIAIR.
ASIAIR Settings – Wired Ethernet – IP Address
For ASIAIR PRO, you can save pictures into USB memory stick and tranfer images with it.
1
0
Using the above connection settings, method 2, the one you suggest. But, it does not work on my laptop. Please help.
2
0
Please try to turn off the firewall and other safe software.
1
0
is there any configuration setup to apply on PC side in order to connect it via WI-FI to Asiair. I’m trying to do what you suggest but it doesn’t work.
Thanks
1
0
It does need.
1
1